Glare refers to the bright spots in the photos. It is caused by the unwanted light mirroring while the photo is captured. The quality of an image depends on multiple factors, such as you may need to remove shadows, background, glare, and other things.
The problem of glare in photos is a prevalent matter. It minimizes the quality and clarity of the images. The reason for glare is the reflection of bright light on the subject. That creates bold spots on the pictures, which is responsible for the lower-quality images.
Importance of Removing Glare for Enhancing Photo Quality
Removing glare is important to maintain the quality of the images. By eliminating the glare you will get better visibility and a professional-looking image. Removing glare makes a visible difference in your photos and improves the features. Professional photo editing software can remove glare easily. Alternatively, you may apply professional services like multi-clipping path services to save time.
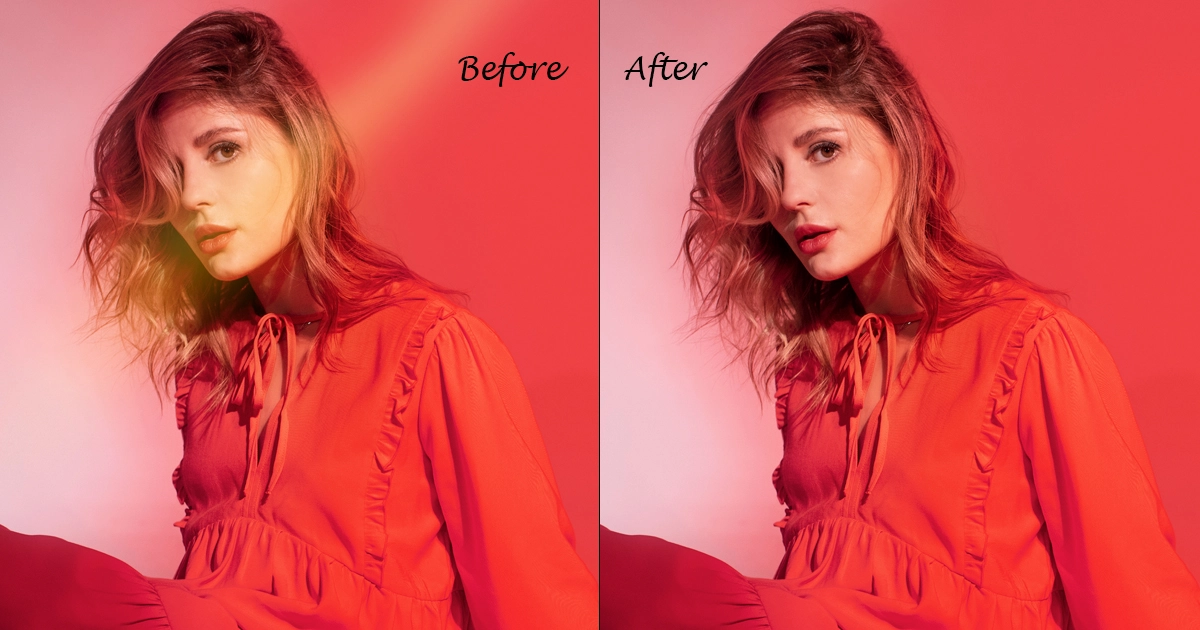
Here are some tools and methods to remove glare
Software Tools
There is a different type of editing software launched for removing glare. You can use Adobe Photoshop, Lightroom, GIMP, and other tools to remove glare effectively.
Camera Settings
During capturing any photo customize your camera settings. Adjust the brightness, saturation, and color contrast level to minimize the glare.
Physical Techniques
You may also apply some physical techniques. Try to polarize diffusers and filters to reduce glare in the camera.
Change Shooting Angle
Try to shoot from multiple angles, and see which angles are free from any bright lights. Move your camera slightly to avoid direct sunlight hitting the lens. And utilize the sun’s soft light as much as possible.
Use Lens Hood
Keep a lens hood with you while going for photography. Especially in outdoor photography during the daytime. It will help you to block out unwanted light that can cause glare in the photo.
Removing Glare by Using Photo Editing Software
Adobe Photoshop
1. Clone Stamp Tool
The Clone stamps tool is useful for erasing the bigger areas of glare. It duplicates the near area’s pixel and replaces the removing area.
Steps
- To do this, open your image in Adobe Photoshop software. From the toolbar section, select the Clone Stamp Tool. For direct selection press ‘S’ on your keyboard. Now adjust the brush size based on your glare size from the brush settings option.
- Click ‘Alt’ near the glare to define the glare source. Click and drag over the glare area and replace it with pixels from the source point. Now adjust the opacity level for smooth blending.
2. Healing Brush Tool
The healing brush works excellently on smaller glare problems. It blends the spot with all of the images and colors to make the image clear.
Steps
- After opening your photo in Adobe Photoshop, select Healing Brush Tool from the toolbar section. Adjust the brush size, try to keep it a bit bigger than the spot so that your selection will be easier.
- Click ‘Alt’ on a near area of the glare that will work as a sample. Now Click and paint the glare after that Healing Brush will work on it and replace the glare area with the sample area.
3. Content-Aware Fill
It is a powerful tool and it can remove a large area of glare perfectly. And blend the removed area technically with the rest of the image.
Steps
- Open the photo in Photoshop software and select the Lasso Tool. Select the glare area accurately and include some surrounding area as a reference.
- Now go to the Edit section, and select Content-Aware Fill. Adjust the setting and click on the ‘OK’ button to apply the fill. Here photoshop will work and automatically fill the selected area with the other part of the image.
- Press Ctrl+D and deselect the selection. Now you can apply the Clone Stamp Tool or Healing Brush Tool to fine-tune the filled area.
Lightroom
1. Adjustment Brush
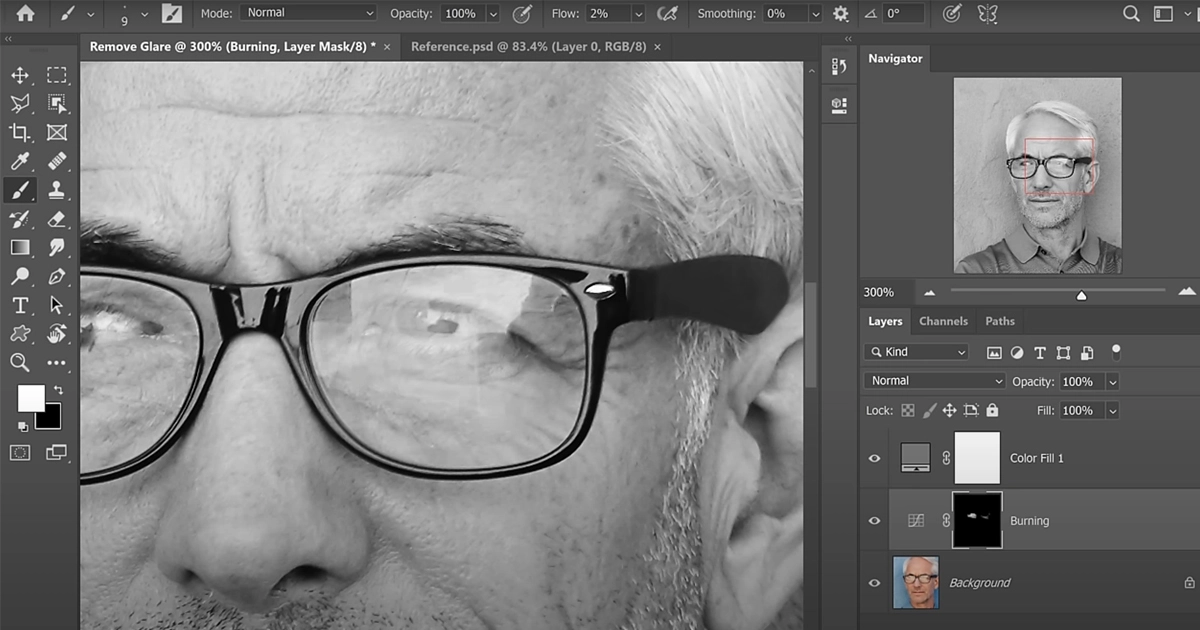
With the Adjustment Brush tool of Lightroom, you can select each area specifically. And remove the glare from the photos.
Steps
- Go to the Adobe Lightroom software and open your photo. From the toolbar section select the Adjustment Brush. Press ‘K’ on your keyboard for direct selection.
- Adjust the brush size for a flexible selection of the glare area. Minimize the Exposure and Highlights from the Adjustment Brush panel to reduce brightness and make the glare invisible.
- After applying the adjustments glare spot will be removed. Blend the glare-removed area with its surrounding area with fine-tuning. adjusts the sliders for Shadows and contrast.
2. Spot Removal Tool
It works well on small glare spots. It clones the surrounding area of a photo and pastes it into the glare area to remove the glare.
Steps
- Open your photo in Adobe Lightroom. From the toolbar select the Spot Removal Tool. Click ‘Q’ on your keyboard to select directly.
- Customize the tool setting for removing and blending the spot with near pixels. Keep the brush size larger than the glare spot and click on the glare spot.
- Lightroom will automatically detect a reference area to replace the glare spot. Click on the ‘Done’ option once all the glare spots are removed.
GIMP (Free Software)
1. Clone Tool
The Clone tool of GMP works effectively to remove glare spots from the photos. It duplicates one part of the photo and pastes it on the glare area.
Steps
- First, Open your photo in GMP software. From the toolbox, select Clone tool, also, you can click o ‘C’ from the keyboard for shortcut opening.
- From the tool option adjust the brush size for easy selection of glare area. Hold the ‘Ctrl’ bar on your keyboard and click the area you want to clone and replace on the glare area.
- Drag the glare spot area and replace it with the cloned area. Now adjust the opacity level for smooth finishing.
2. Healing Tool
This tool is suitable for removing minor glare spots. It removes the spot and blends it with the sample area you selected.
Steps
- Open GIMP software and open your photo on the GIMP. From the toolbox section, select Healing Tool.
- In the tool option, adjust your brush size, the size needs to be larger than the spot. Hold ‘Cltr’ and click on the sample area near the glare spot.
- Now, click and paint the glare; simultaneously, the Healing Tool will blend the sample area with the glare area. You can repeat the process if needed.
Mobile Apps
1. Snapseed
It is a mobile app for editing photos. It has a group of tools to remove glare spots. Below are the steps
- Open your photo in Snapseed. At the top of the screen, you will see the ‘Tools’ option, select the healing tool.
- Zoom the glare spots by touching on the screen. Select and drag the glare, Healing Tool will replace the glare with a clean part of the photos.
- Furthermore, You can apply the brightness, saturation, or exposure to blend the overall picture. Once you get your desired result save the photo on your mobile from the save option.
2. TouchRetouch
TouchRetouch is another mobile app for photo editing. It works on removing imperfections, extra objects, and glare spots in an image. Removing glare in several.
- Open your photo on the app after that from the top menu bar select the Quick Repair tool. Here you will get the ‘Brush’ option, click and adjust the brush size.
- Zoom the glare area and the pain over it. The app will detect and replace the glare with another part of the image.
- If the area is quite large go for the Lasso tool. Select the Lasso tool from the menu bar, and select the spot area. Click on the ‘Go’ option to remove the glare. Further, you can apply the Clone Stamp tool if needed.
The tools we discussed are the best compared to other tools. These tools are best suited even for E-commerce image editing.
Advanced Techniques
1. Frequency Separation
It is an advanced technique that works on separating the color and texture in a photo. With this technique, you can work on a particular part of an image without affecting the other part. It has a high-frequency layer and a low-frequency layer that has the texture and overall color details of the image.
Steps
- First, Open your photo in Adobe Photoshop software. And duplicate the layer to keep the original version of the image.
- Click ‘Ctrl+J’ on your Windows device and ‘Cmd+J’ on your Mac device to duplicate the layer. Make the name of the top layer ‘High Frequency’ and the middle layer ‘Low Frequency.’
- Now click on the eye icon and turn the visibility of the High Frequency layer. After that select the Low Frequency layer.
- Go to the ‘Filter’ section and click on ‘Blur’ then ‘Gaussian Blur’. In this step adjust the radius. Turn on the visibility of the high-frequency layer and select it. Go to the image option, select apply image set layer to ‘Low Frequency.’
- Set Blending to ‘Subtract’ for the 8-bit images and add for 16-bit images. Now click ‘OK.’ Change the blending mode of the High Frequency layer to ‘Linear Light.’
- Group two layers by selecting them and pressing Ctrl+G on a Windows device and Cmd+G on a Mac.
2. Dodge and Burn
It works on the exposure of specific parts of a photo. It helps to blend the glare spots and improve the quality of a photo.
Steps
- Open your image in Adobe Photoshop. After that create a new layer. Click ‘Cltr+Shift+N’ on the window device and ‘Cmd+Shift+N’ on the Mac device.
- Go to the edit option then click fill and 50% Gray option and fill the new layer with that. Change the new layer blending mode to ‘Overlay.’
- It will make the gray layer invisible, still, you can do Dodge and Burn. From the toolbar select the Dodge tool and set the range to ‘Highlights.’ Keep the Exposure low, and paint the glare spots and light them, blend them with the rest of the image.
- Now from the toolbar go to the Burn Tool. Set the Range to ‘Midtones’keep exposure lower and paint the glare. Make them dark and invisible. Finally, adjust the other things like opacity, and saturation level or apply further Dodge and Burn to get a natural look.
Undoubtedly, removing glare is important for improving the quality of the images. To remove the glare or minimize it try to select the best time to take photographs outside. So that, light reflection will cause less glare in the photos you captured. Also, customized camera settings, set filters, and experiment with different photo capturing angles.

